Neck Graft
When we speak of a neckgraft in violin making we mean when the neck
of an instrument is replaced. The original peg box and scroll (head) of
the instrument remain preserved during the process.
The reasons for carrying out a neckcraft can be manifold:
- The neck is broken.
- The height of the bridge, as defined by the neck angle, is not optimal due to tonal or other reasons.
- The neck is contorted.
- The neck is too thin and doesn't suit the musician.
- The neck is skewed in relation to the body cannot be optimally compensated for with the bridge, which should always stand at the acoustic center of the instrument.
The following tasks are necessary for this:
- First the fingerboard is detached.
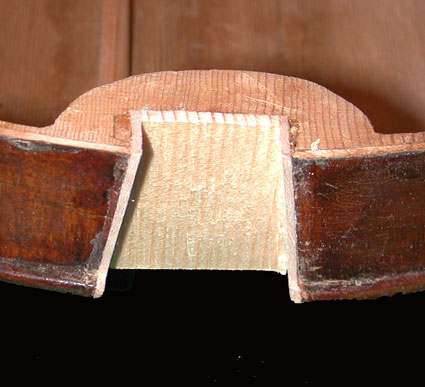
- The base of the neck is unhinged from the body's neck recess,
for clarification you can see here the recess without back and
belly.
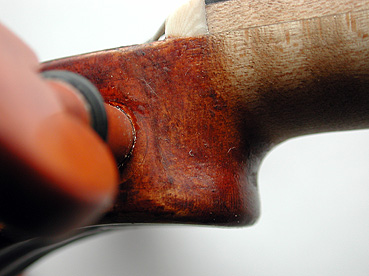
- The neck is separated from the peg box.
- The two upper or all four peg holes (the e and the g with violins, the a and the c with cellos and violas) get rebushed.
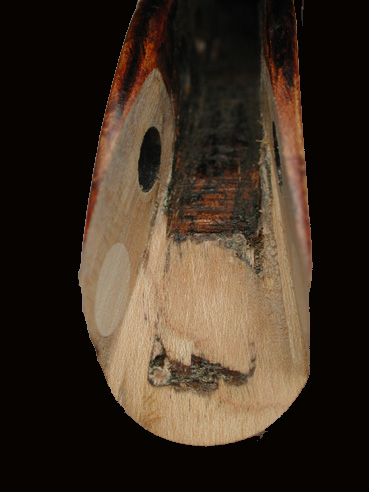
- The peg box is prepared for the graft. All areas are processed
until everything is completely trimmed. This is very time-consuming and
difficult work.
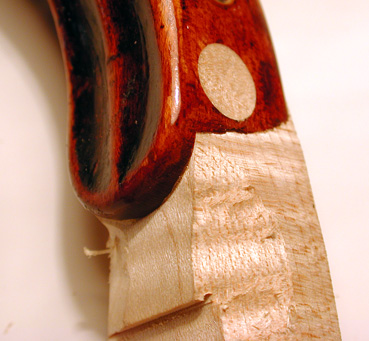
- The graft block of aged maple is planed in such a way that it
fits smoothly into the prepared opening. Here, too, very precise work of
high technical skill is essential. While inserting the neckgraft, one
must not only take special care to get an exact fit, but to also see to
it that the middle line aligns between scroll, neck and body and that
the neck and scroll sections are
flush.
- The next task is to fit the fingerboard and see that the neck is cut in a way as to make playing the instrument easy. Individual adjustments are always possible here.
- The neck foot is then placed into the neck opening in such a way that the angle and, with it, bridge height are optimal, ensuring that the fingerboard points directly at the instruments middle.
- Retouching is all that remains to do now after this complicated
repair. Here you can see the near finished
neckgraft.