
Soundpost adjusting
he sound post is a small cylindrical spruce stick wedged between the belly and back of the instrument. In violin making one also calls this little piece of wood the soul (anima in Italian). The reason for this is that the sound post plays a considerable role in producing the sound that the violin maker can get out of the instrument. My own experience has been that there is no "normal" or standard position when it comes to where the sound post is placed. It is much more a question of locating the ideal position for the individual instrument. This works optimally only in cooperation with the musician and can often be quite a tedious process.

Here you can see the tool needed in violin building to adjust the sound post.
For fitting the sound post the same woodcarving knife is used which you saw under the Bridge category.
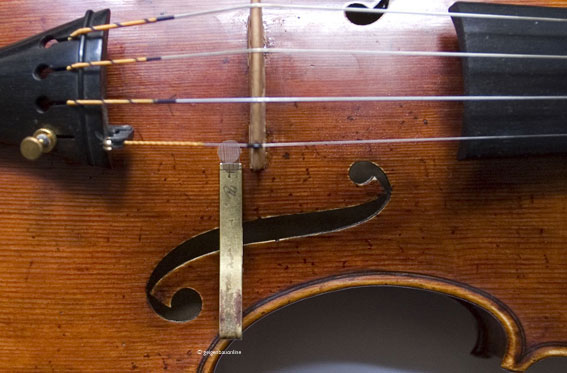
On this photo we have let a sound post "shine through" in order to make clear how the sound post feelers are inserted. Some sturdy cardboard will work fine for this. This can be important once the right position on your instrument has been found and you want to mark it to keep this in mind.
One of the fundamental rules of sound post positioning:
- The sound post should never lie beyond the bridge foot pointing toward the f-hole discant
- It should never be closer than half the length of a bridge foot to the bridge
Attention before undertaking any action with the sound post:
- Always(!!) tune down the strings considerably. The top two completely, if possible. Otherwise this could damage the belly's interior which could lead to extensive repairs
- In addition, look first closely through the f-holes with a dentist's mirror to check the exact positioning of the sound post
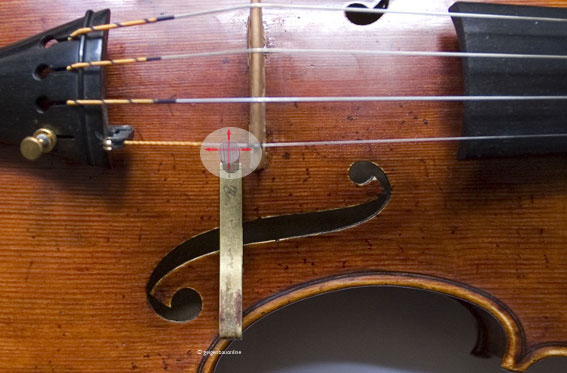
On the photo you can see the various ways in which the sound post can be adjusted. Diagonal movements are also possible, of course. Both can be carried out on the sides of the belly and back. The arrows on the photo are only here in this size to clarify. Normally, the slightest alterations, sometimes unobservable to the naked eye, are enough to generate distinct tonal changes. Adjusting the sound post is done with the tuning setter. The point of the tool serves to carefully transfix the sound post and then advance it through the f-holes. Even if the sound post drops through, it can be retrieved from the instrument through the f-holes again.

The changes represented in the photo are very approximate conclusions. The actual tonal changes will be more clearly differentiated. But the conclusions reached here are basically true, although there will also be exceptions as instruments sometimes react in varying ways.
In so doing, the sound post should stand as upright as possible in both directions. Looking through the f-hole, one can use the wooden tune ring or the corner fastening for optical orientation.
The mirror can also give one a good picture as to the sound posts correct upright position. The button hole in the lower block offers an even better way to check this (all strings must be removed from the tailpiece first, however).
Unfortunately, then such scenes can then be witnessed:

If you recollect what was written at the beginning: Before the sound post adjustment process begins, make sure to see that the sound post will fit properly. As seen on the photo, this one only fits on the inside. During adjustment, its sharp edge will destroy the bellys sensitive fine fibers. Therefore be warned: Handle the sound post of your instrument with great care. If sound posts are poorly fit and remain that way too long it can come to the damage seen in the photo above or even lead to so-called sound post cracks. These are the worst belly cracks in violin building, they run above the sound post itself and can only be repaired in a very laborious manner. And a crack like this always leads to a depreciation in instrument value.
Would you like to know more? Place your questions in our forum where you will get quick and competent answers.