Pegs
Your pegs dont turn well, get stuck and you can only turn them in quarter tones? That can really get a musician out of tune. But you dont necessarily have to go to the violin maker in this case. If the pegs fit well and the peg holes are cut perfectly round, you should be able to take care of your pegs yourself. Please work with one peg after the other. After you have released one, string it again, repeatedly. That way the bridge keeps its tension and you avoid that the sound post falls over, in the worst case scenario. After tightening each string check every time to see that the bridge continues to stand upright.
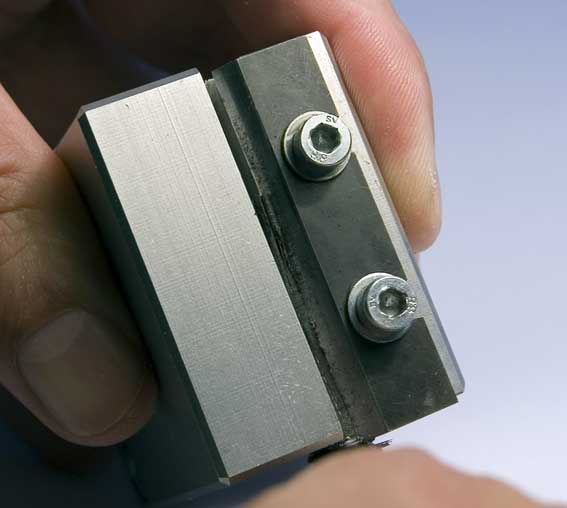
This is the tool used when working with pegs (the peg shaper is a professional tool in violin making):

We display here the peg shaper to show you how one can fit or refit pegs in violin making.
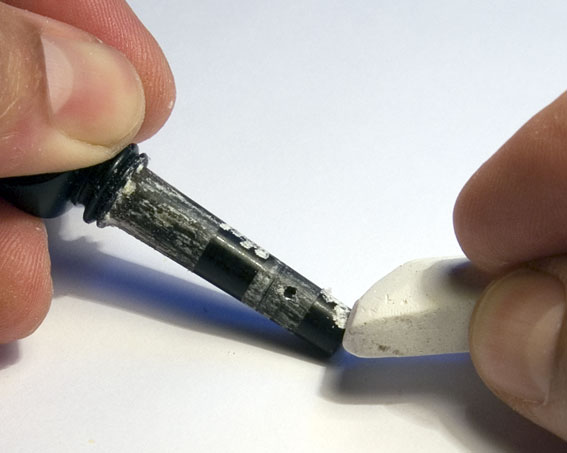
The first task is to thoroughly rub in and around the peg from all sides with old curd soap:
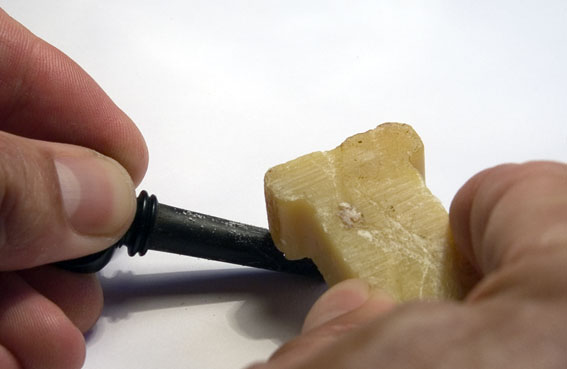
Make sure that you have a thick layer of curd soap all around the peg!
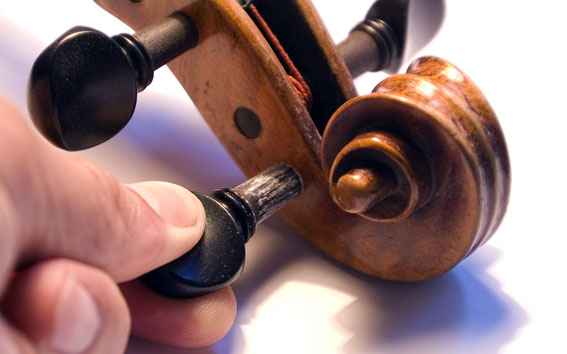
Now the treated peg will be turned around several times in the peg hole to see that it really fits well. You can already see the accuracy of the fit while turning the soapy peg in the peg hole. If the peg really doesn't turn properly but wobbles instead, then you should bring the instrument to the violin maker. We will show you what he does with the peg in this case later.
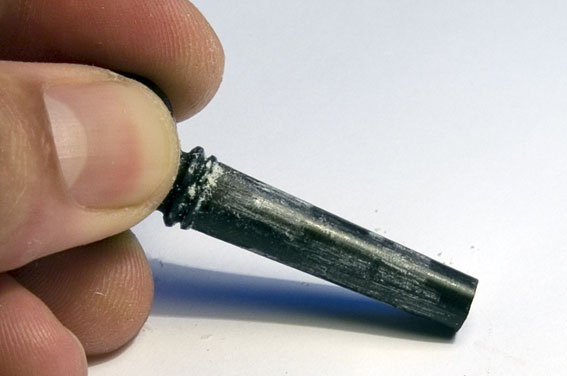
After repeated turning with light pressure, the peg should look like this:
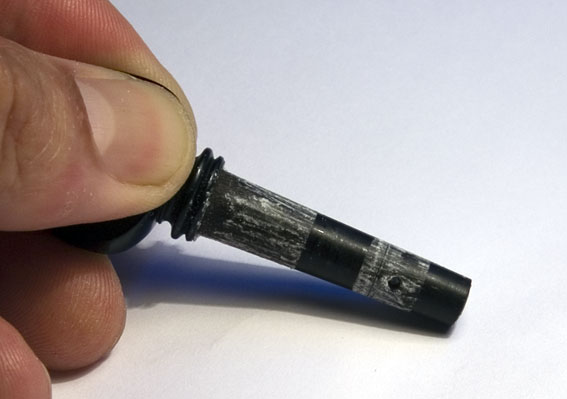
One can clearly see that the peg box lines up everywhere with the thread. That way fine tuning afterwards is assured.
Once again rub curd soap around the peg as described above, but this time turn the peg repeatedly in the peg hole with more pressure than before. Repeat this procedure until the peg turns very smoothly and easily.
To make sure that the peg doesn't slip, white chalk is now used. This is similar to the soaping procedure, only less chalk as soap is used. The peg should continue to turn smoothly, but firmly enough to keep the peg from slipping.
Finally, following the chalk treatment, the peg is turned repeatedly
in the peg hole. Should the pet still turn too easily, repeat the
procedure.
Once you have treated all your pegs in this way, you will be thrilled with the results.
But what does one do in violin making when the peg does not fit and looks like this after having been soaped up:
Clear to see: This peg does not sit properly and has to be refit. To be sure that the peg hole is round, it is carefully rethread with a so-called peg reamer:
The next task consists of recutting the peg with a peg shaper. The peg shaper shown in the photo can be adjusted to any cone and peg diameter by means of a moveable carriage and allows for the finest reduction of wood shavings.
We dont think too highly of the special soaps one can buy for pegs. We have seen thickly covered black peg holes too often due to these, a condition that leads to pegs which turn poorly.
And when you find that your pegs don't turn properly and that the surface area doesn't look as seen above, then its time to visit your violin maker, it will be worth the effort!
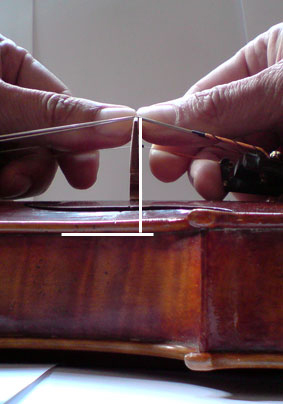
Dont forget to check the bridges position. Due to the tightening of the strings, the bridge gets pulled in the direction of the fingerboard. Place your violin on a table (please place a soft cloth underneath) and put your thumbs on either side of the upper edge of the bridge. Now you can carefully press the bridge back and forth with your thumbs, back to the correct position. A rule of thumb here is that the side facing the tailpiece should be at a right angle to the bellys surface area. Being that the side of the bridge facing the fingerboard is slightly curved, it appears as if it is inclined a bit toward the tailpiece.